Elopement & Intimate Wedding photographer serving Indiana, Maine, colorado, utah, & Beyond


Preparing Images for the Blog Post {Education for Photographers}

Blogging has proven to be a very effective way of communicating my style, showcasing my best work, and it gives viewers a reason to come back to your website! If you don’t blog your images yet because it seems like a big task (and it can be!), I’m here to help discuss ways of making the task of blogging a little less scary! Today I want to share my tips for preparing images for the blog post!
1. BLOGSTOMP!
Blogstomp has been a LIFE SAVER for me when it comes to quickly and effectively preparing images for a blog post! I went from spending hours preparing images in Photoshop to spending minutes preparing them in Blogstomp! For those of you who already use Blog Stomp, way to go! You’re ahead of the game! For those of you who have never heard of Blogstomp, it is a downloaded workflow tool for photographers that simplifies and expedites image preparation for web use.
You download the software, drag and drop the images you want to use, hit the “stomp” button, and Blogstomp automatically resizes the images for the fastest upload time without losing resolution quality! You can stomp a single image (such as a horizontal), or you can pair images together (such as two vertical images… my favorite!). Gone are the days of manually pairing images in photoshop! Blogstomp has TONS of other features, like cropping, adding borders, and adding watermarks! For $49, Blogstomp has been one of my FAVORITE investments so far!
2. Pairing Images
Some photographers prefer to shoot mostly horizontal images, while some photographers prefer to shoot mostly vertical images (ME!). Whatever your preference, knowing how to pair images for a maximum viewing effect is good knowledge to have! Images can tell incredible stories when paired together! And viewers naturally make different sets of connections when photos are presented as the same work. Not only can paired images tell stronger stories, but they also help viewers move from one photo to the next. And bonus points, if you pair images correctly, your work will look more diverse than it might actually be! So, let’s talk about how to pair images for maximum effect!
Try to use images that are different. This can mean different in composition, different in pose, or different in subject matter. By pairing two images that are not alike, you’re eliminating the possibility of the viewer comparing the images and deciding that one is better than the other. You want the viewer to think that ALL of your images are amazing! Pairing two images that are different will also allow you to use similar images in different sections of the blog post. This will create the illusion that you had more variations from that session than you really did! Scroll down for examples and more tips!
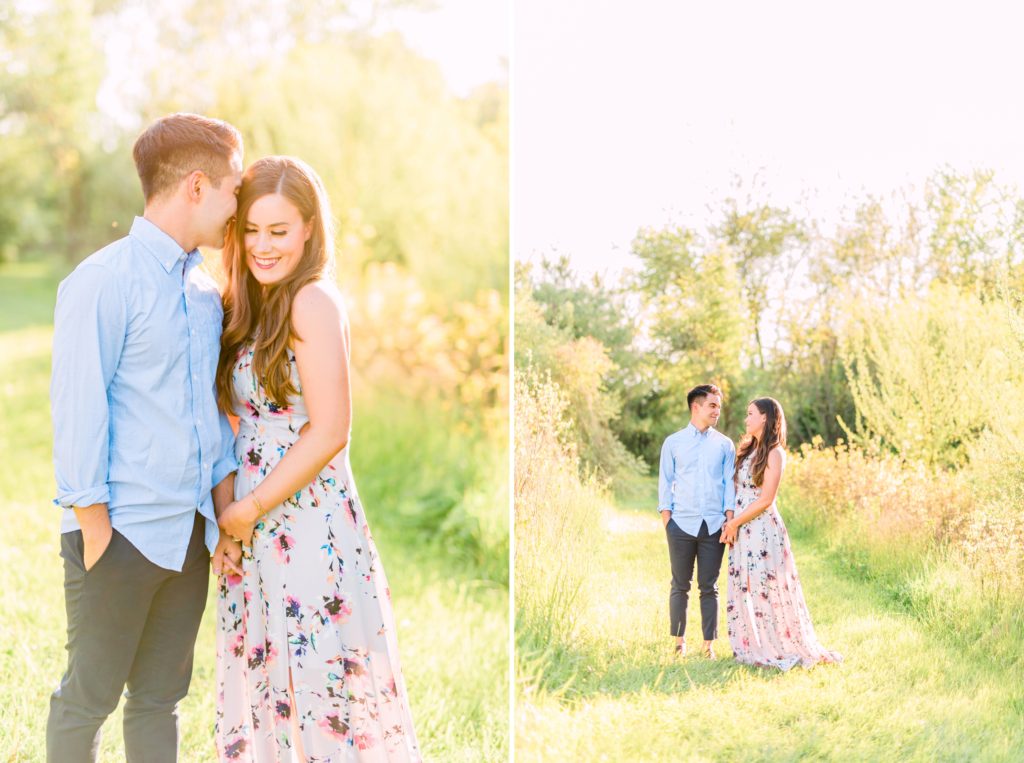
In the pairing above, I used a similar pose, but I used a completely different composition. This is what makes this pairing work. If I had shot the image on the left with the same composition on the right, the viewer would likely decide that they liked one or the other more because they’d be so similar. This also makes viewing work less fun for their viewer. Instead of viewing one image, they now have to view two that are almost identical. If it were me scrolling, I’d scroll faster and spend less time looking at each individual image, wouldn’t you?
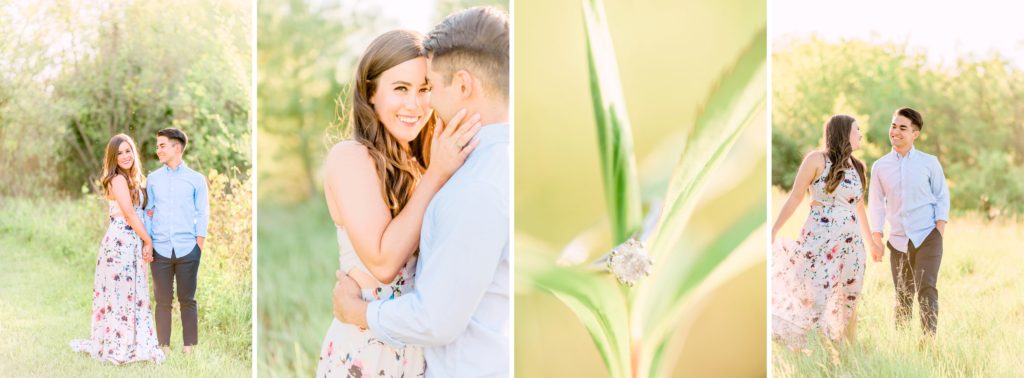
In this pairing, I want you to notice three things. The first being that there’s a detail shot, and couples shot. If you only have images with people in them, it gets harder to differentiate the images. By adding a detail shot here and there, it breaks up the blog post and allows the viewer’s eyes to relax. I pair my detail shots with my favorite images from each session. I do this in order to let my favorite images really shine! By including a detail shot in this pairing, the focus leans more towards Tanya & Max!
The second thing I want to point out is that I deliberately put the image of Tanya & Max on the right side. Because they are composed closer to the right side of the frame, it allows the viewers eyes to gently travel from left to right and on to the next image. If I had put the detail shot on the right, Tanya & Max would be sandwiched between the left and right sides of the pairing, and that would create and uncomfortable, tight, and stiff feeling.
Lastly, imagine that the first pairing in this post is stacked directly on top of the second pairing. Now imagine that the detail shot was on the right of the pairing above. When scrolling, you would have a 3/4 length image stacked on top of another 3/4 length image. Always try to mix up which images are on the right and which are on the left to avoid the left side being all 3/4 length, and all the images on the right being full length. Doing so will create the illusion of variety and will make the blog post more enjoyable for the viewer!

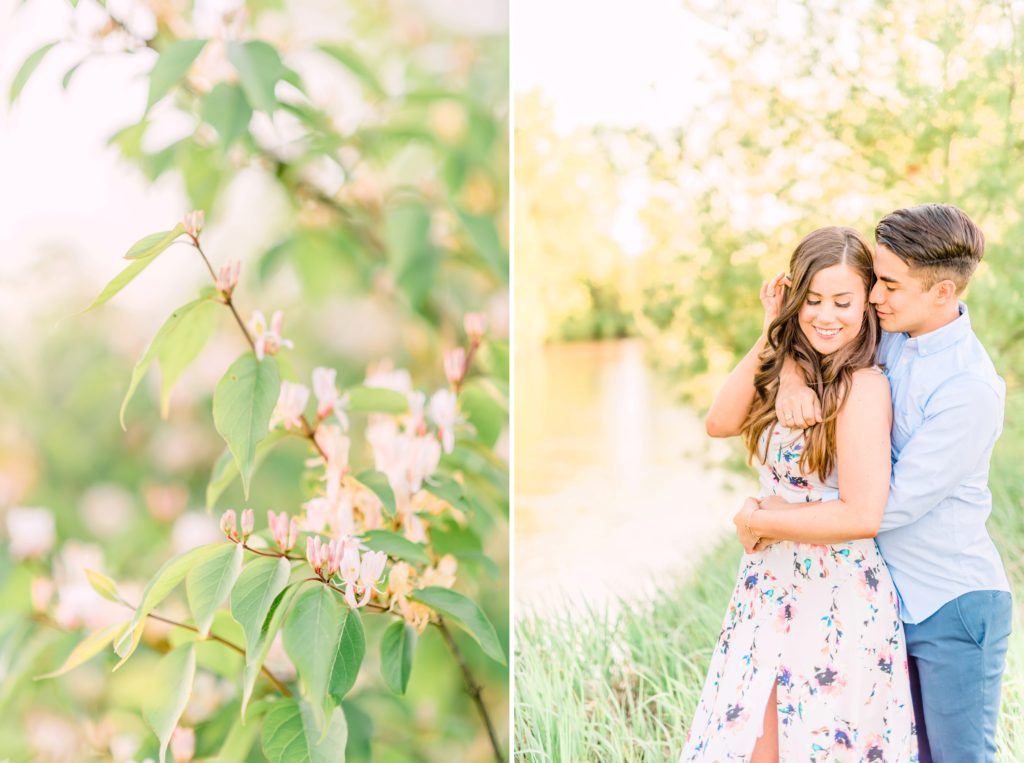
For my last example of pairing blog images, this is what I personally believe photographers should avoid doing: pairing two images that are almost identical. The only difference in these images are the direction that Tanya is looking. By pairing these two together, the viewer can now easily compare which image is better (or worse)! If each of these images were separate, the viewer would be able to appreciate each image as they are without feeling the need to compare. Imagine if all of your images were paired like this! It would create a very stagnant mood, and it would seem like you didn’t have as much variety in your shots!
However, if you must pair similar images together, try to do it strategically! In the left image, Tanya is looking over her shoulder towards the image on the right. This naturally helps lead the viewers eyes to the next image.
As much as possible, you want the viewer to have a seamless, easy, and enjoyable experience when viewing your work! I hope this post will help you as you begin your blogging journey! Blogging can be a big task in your business, but the rewards are SO great! Don’t get discouraged and start small! A blog post with 10 images is better than a sneak peek with 1! Don’t forget to check out BlogStomp for the easiest and fastest way to blog your images! And be sure to use the pairing techniques to leave your viewers head over heels with your work! Leave your comments below for next weeks topic and “like” Bailey Elle Photography on Facebook for more updates!


